
Create a Project
You can fully access our APIs only after you create a project, select an API suite, submit a contract and your contract is reviewed.
- Click Manage Project on the left Navigation pane. The Manage Projects page is displayed.
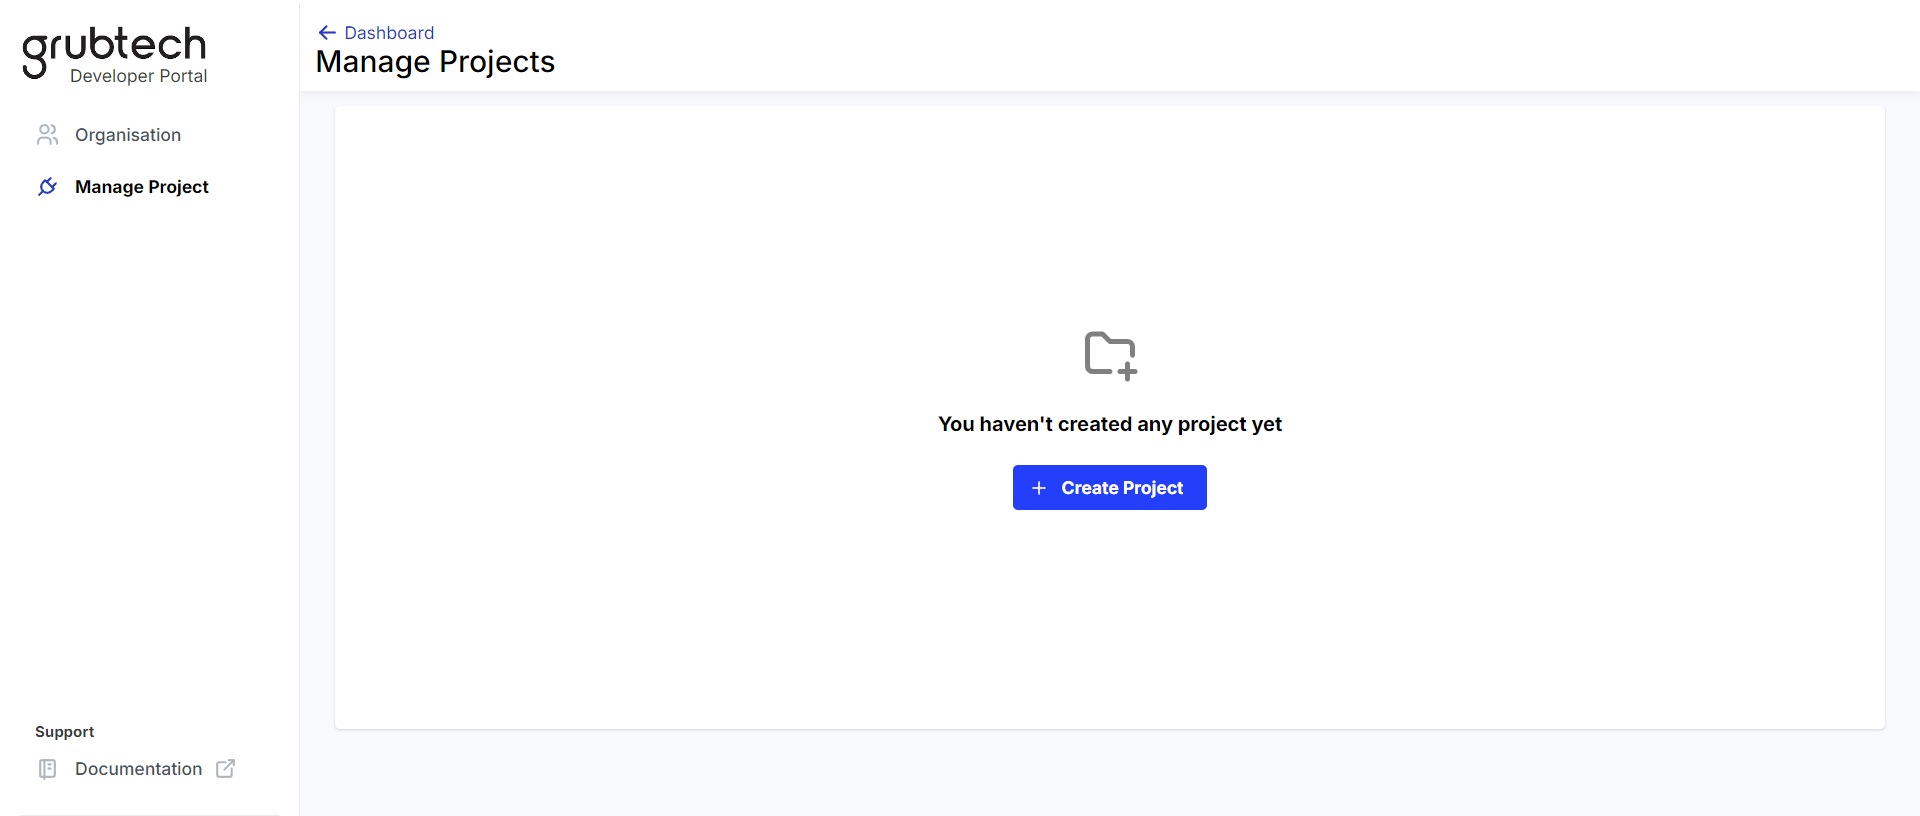
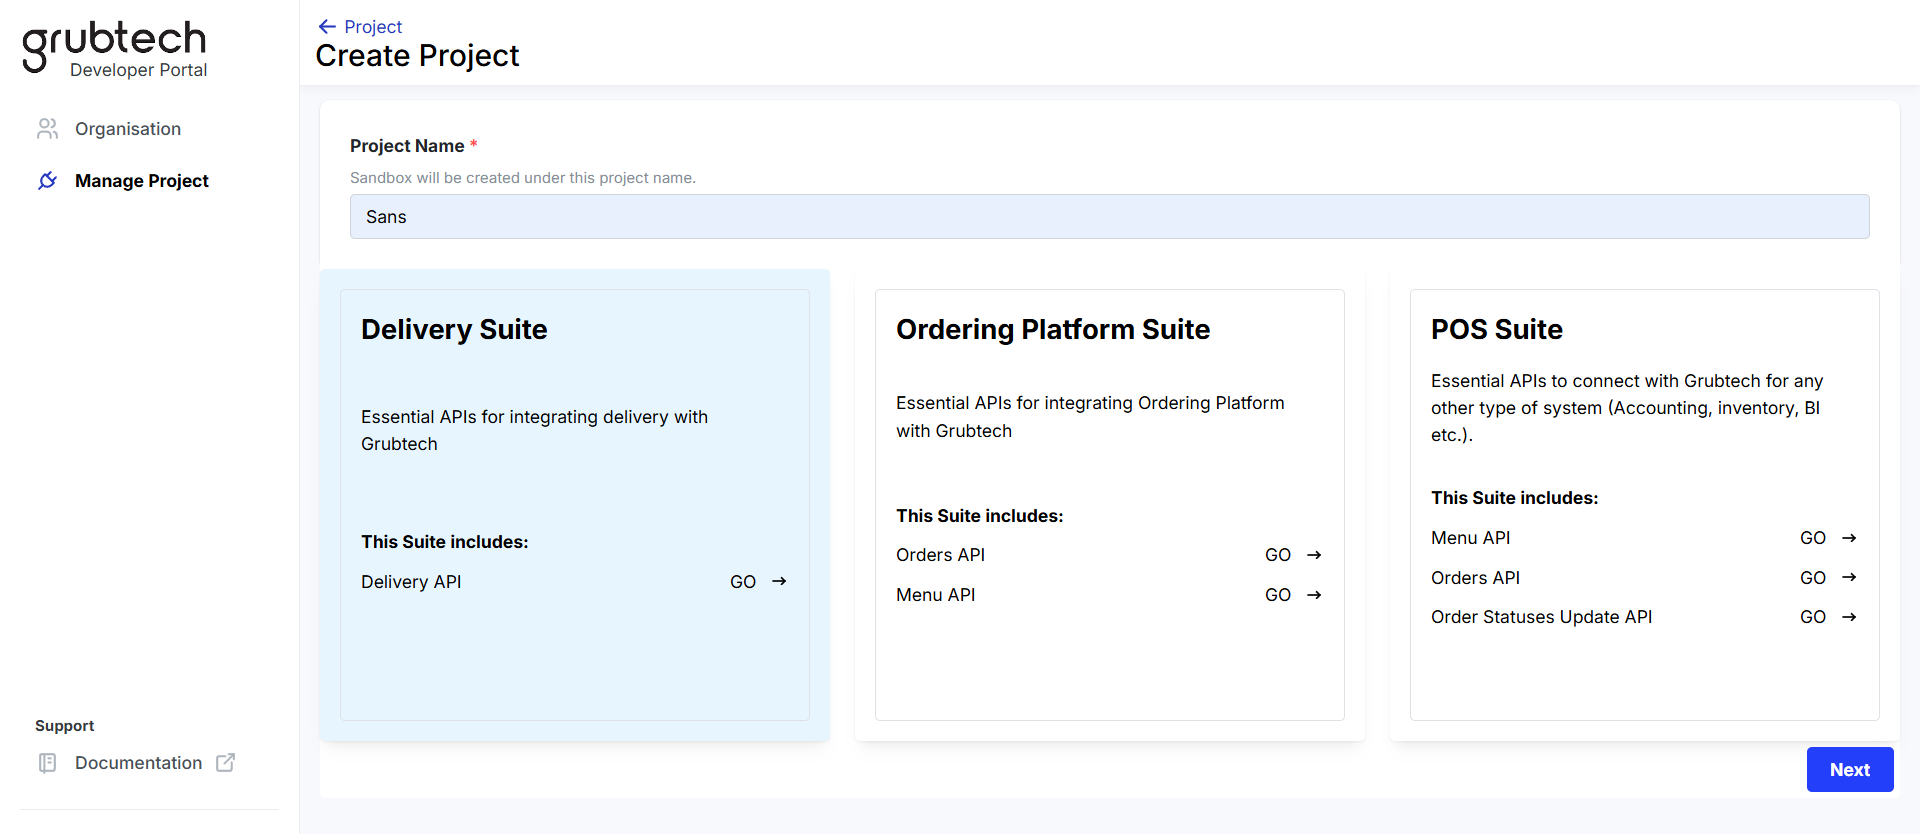
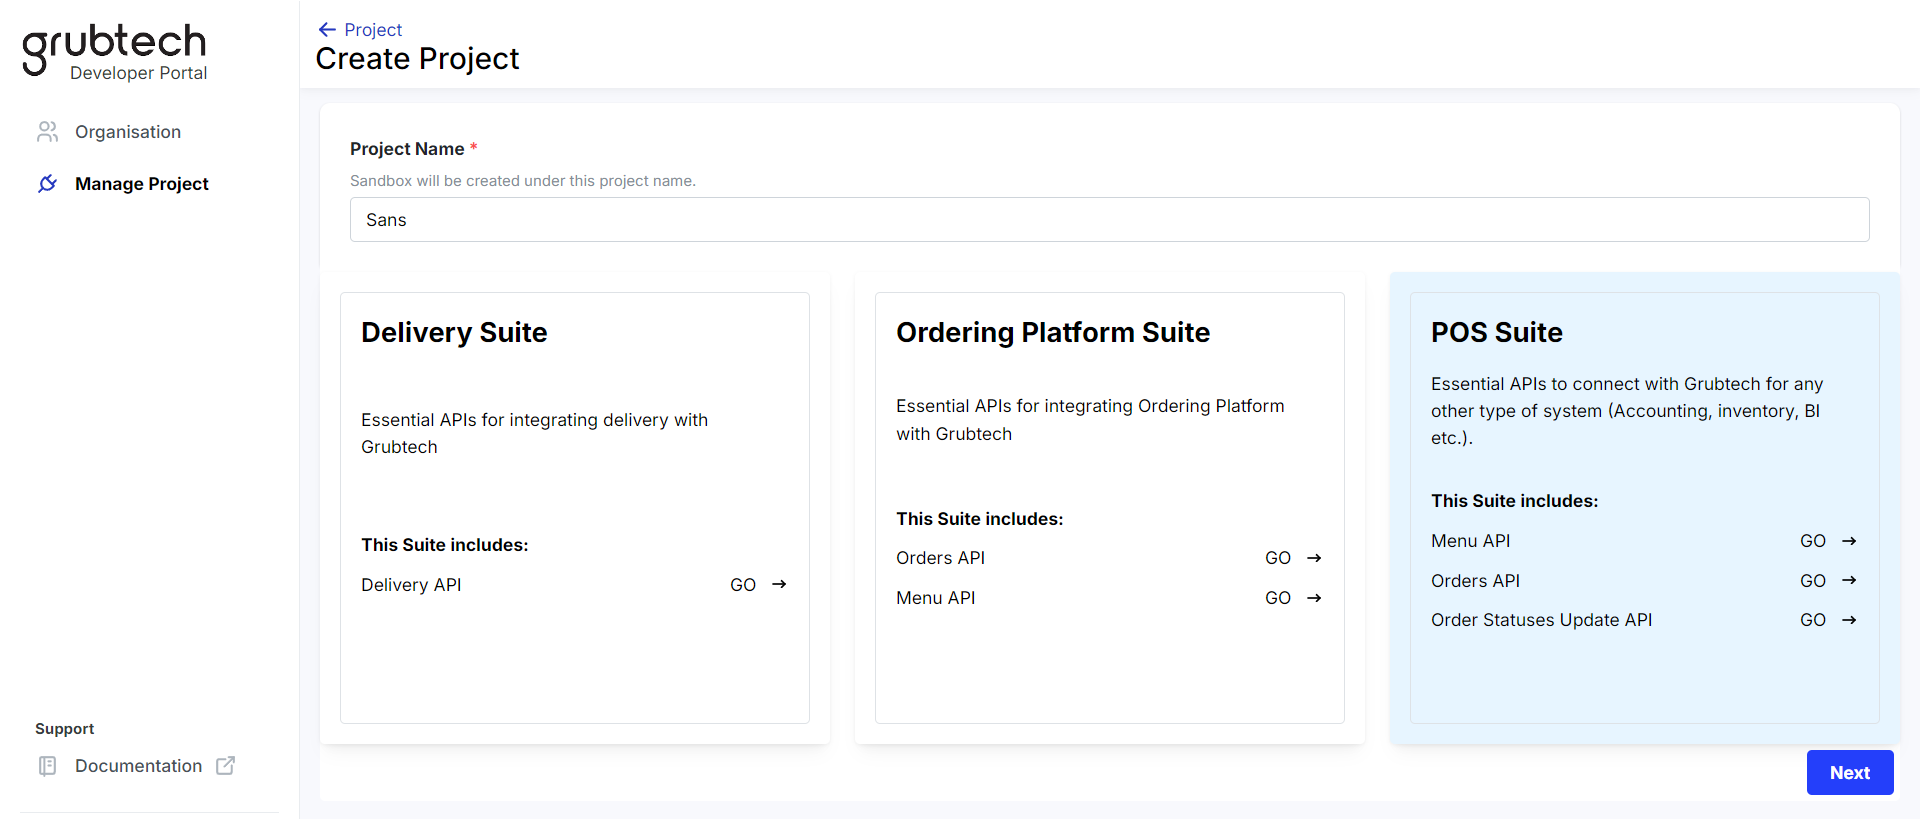
- Click the + Create Project button. The Create Project page is displayed.

- Select an API Suite.
- In the Project Name* box, type a name for your project. The Sandbox will be created under this project name.
- Select the API Suite you require. The selected API is highlighted and displayed.
- Click Next. A confirmation message is displayed.
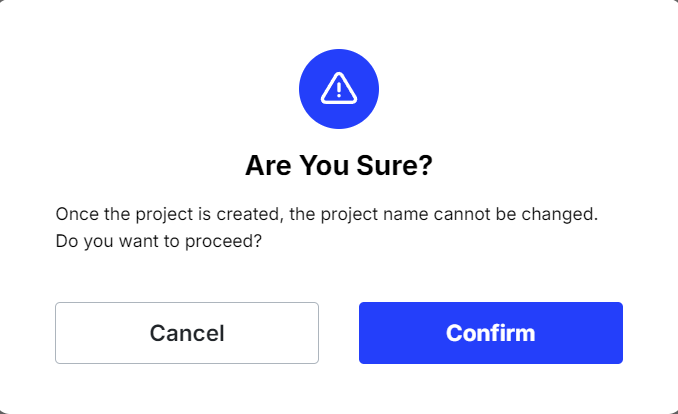
NOTE: Once your project is created, your project name cannot be changed.
- Click Confirm. The questionnaire for the supported system functions is displayed.
Activate an API Suite
To complete the project creation, you must select API suite to activate. Grubtech offers you the choice of 3 API Suites.
- Delivery Suite - Contains APIs required to integrate delivery with Grubtech.
- Ordering Platform Suite - Contains APIs necessary to integrate food aggregators with Grubtech.
- POS Suite - Contains APIs essential to connect Grubtech with any other system.
Activate the Delivery Suite
-
Click Manage Project on the left Navigation pane. The Manage Project page is displayed.
-
Click the + Create Project button. The Create Project page is displayed.
-
In the Project Name* box, type a name for your project. The Sandbox will be created under this project name.
- Select the Delivery Suite as the API you want to activate. The Delivery Suite API is highlighted and displayed.
- Click Next. A confirmation message is displayed.
- Click Confirm to confirm the creation of the project. The Select the functions that you support page is displayed.
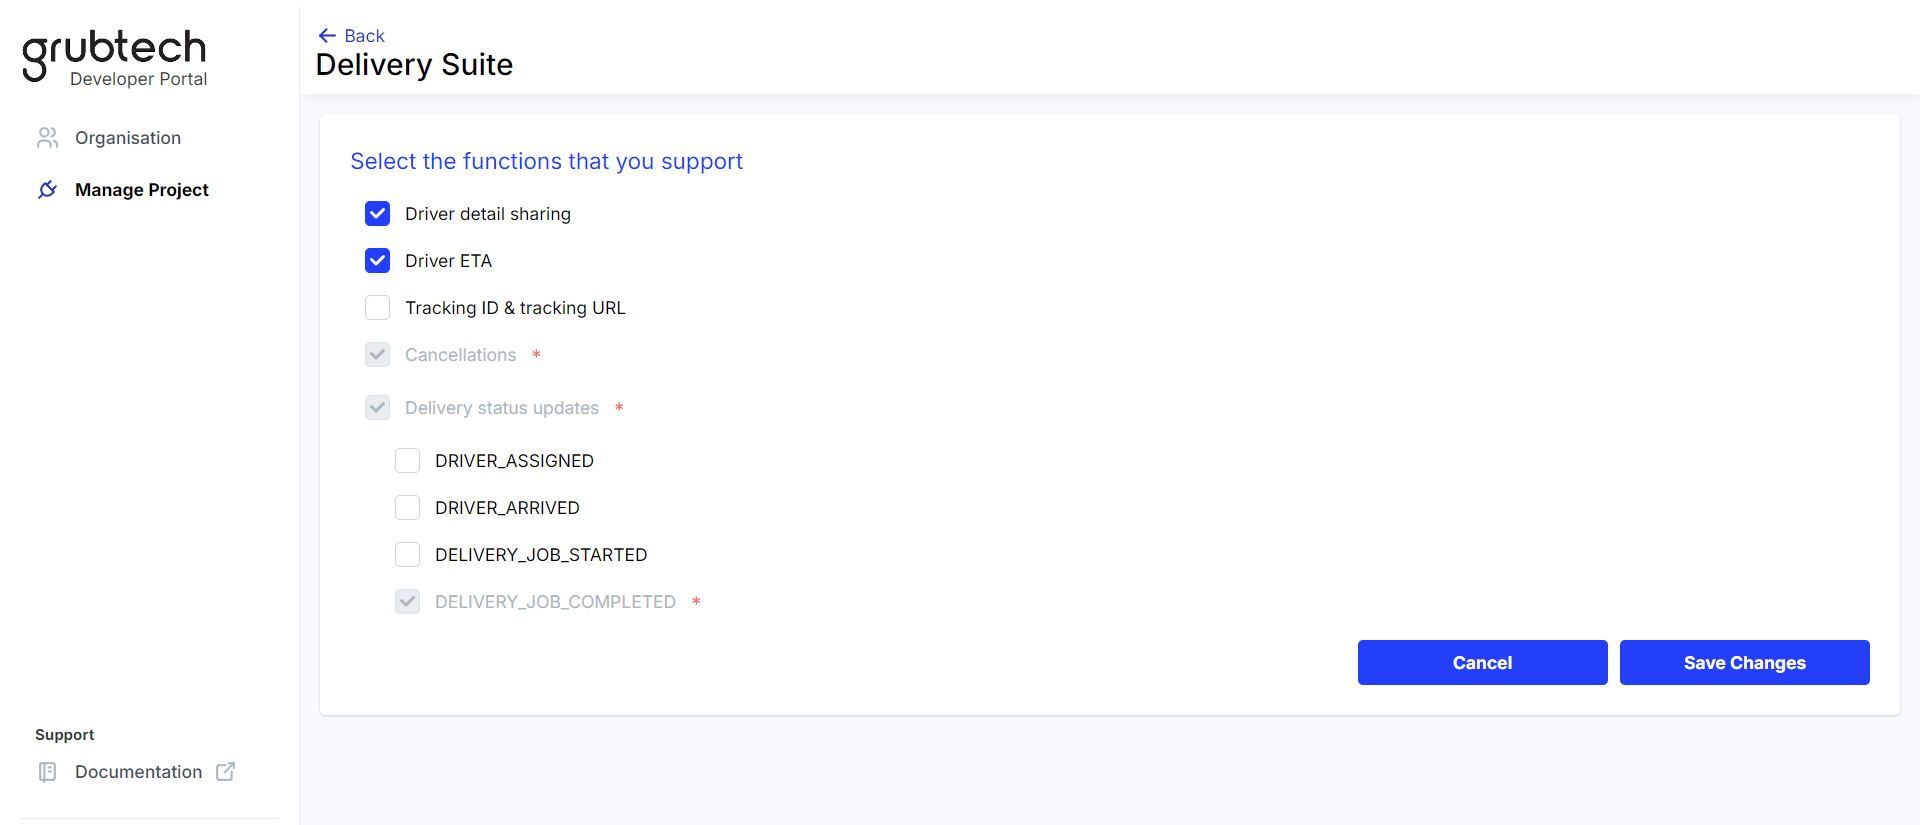
- Select the features that are supported by your system for the Delivery Suite.
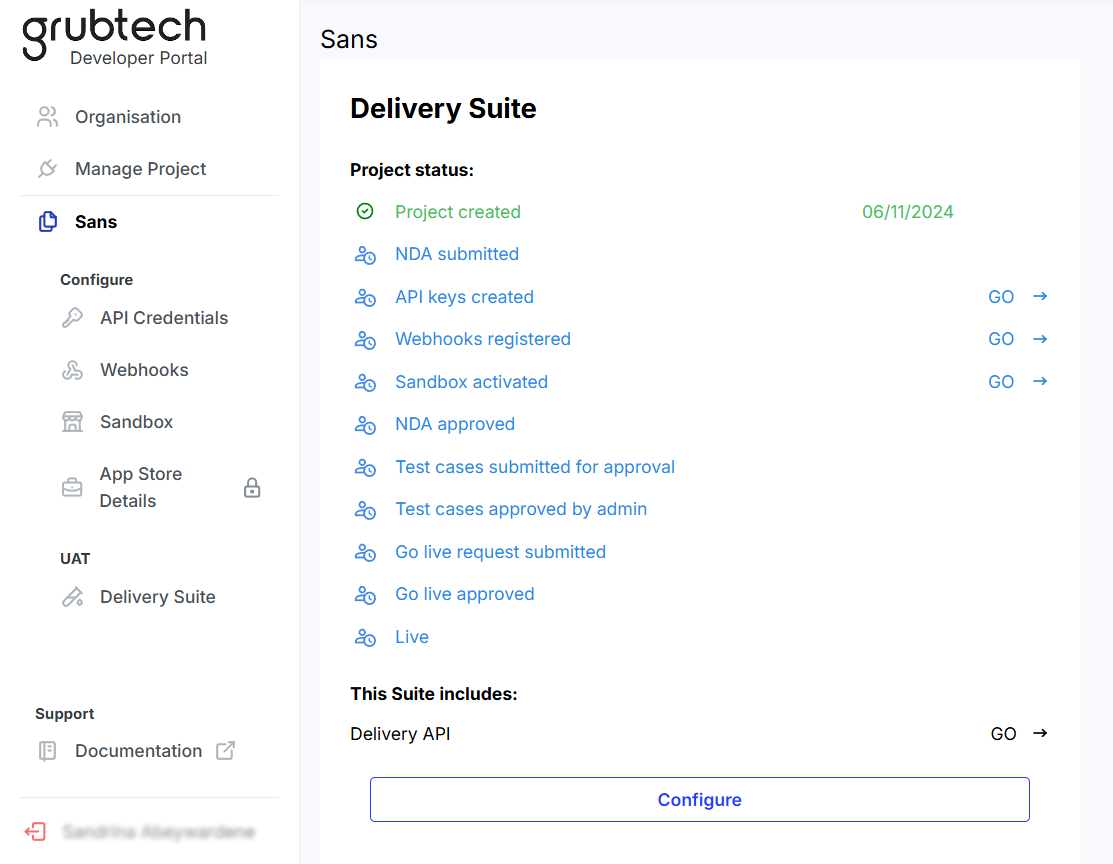
- Click Save Changes. The Delivery Suite status is displayed.
Activate the Ordering Platform Suite
-
Click Manage Project on the left Navigation pane. The Manage Project page is displayed.
-
Click the + Create Project button. The Create Project page is displayed.
-
In the Project Name* box, type a name for your project. The Sandbox will be created under this project name.

- Select the Ordering Platform Suite as the API you want to activate. The Ordering Platform Suite API is highlighted and displayed.
- Click Next. A confirmation message is displayed.
- Click Confirm to confirm the creation of the project. The Select the functions that you support page is displayed.
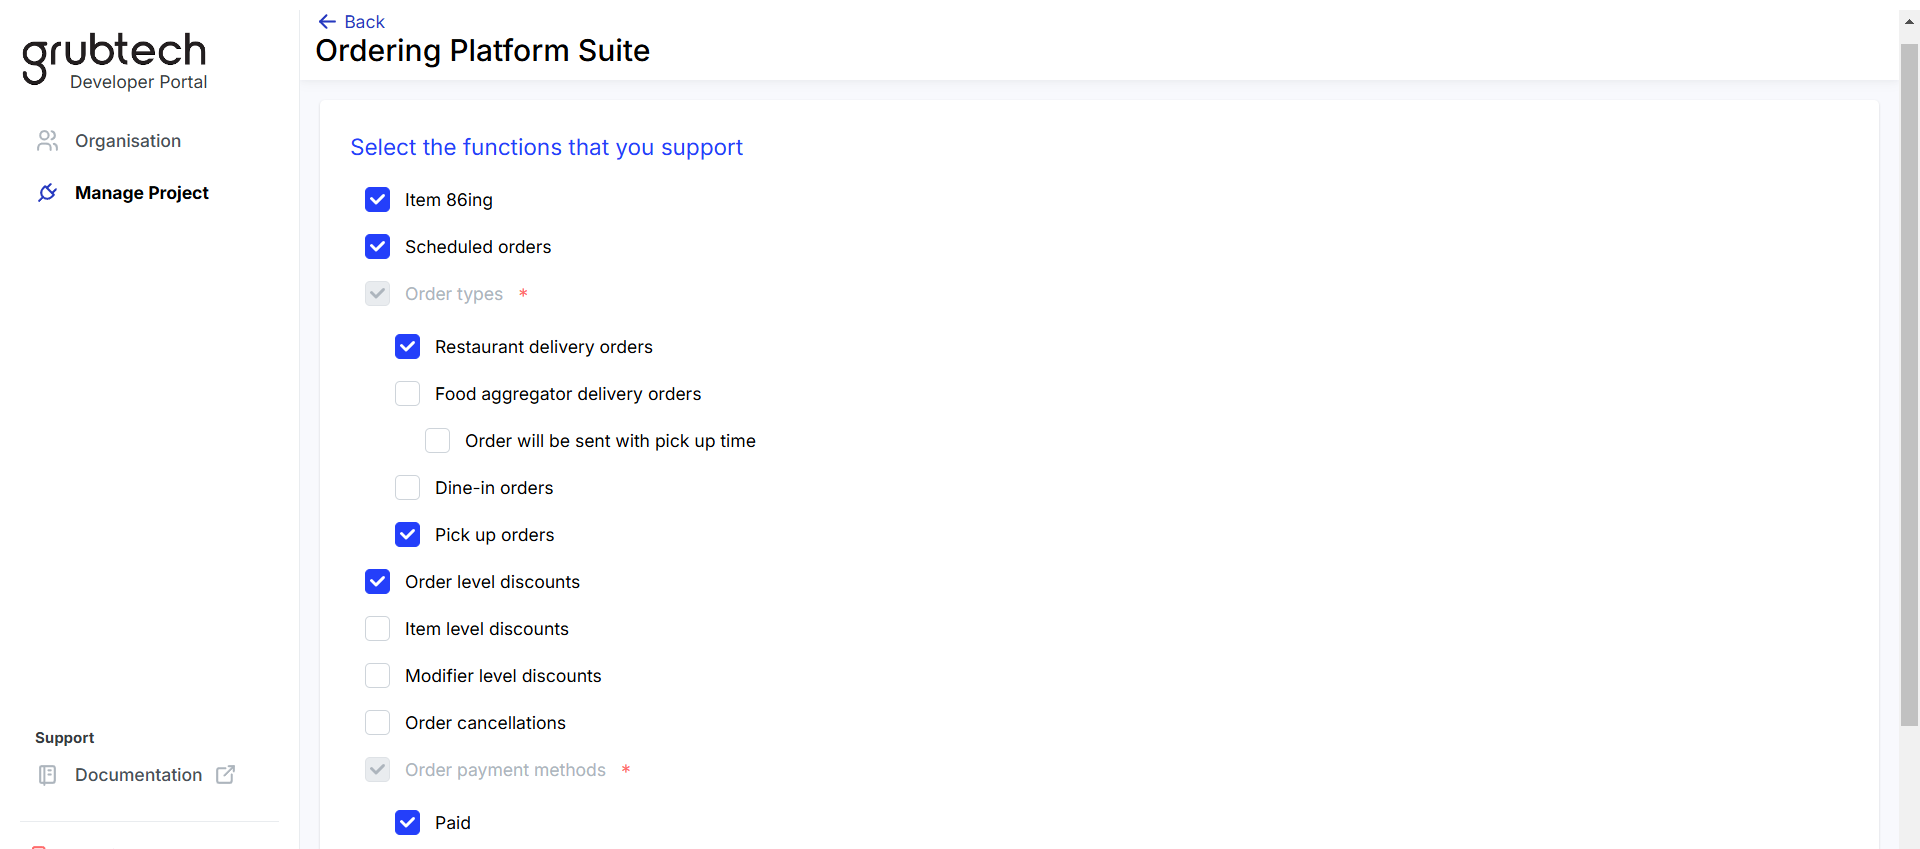
- Select the features that are supported by your system for the Ordering Platform Suite.
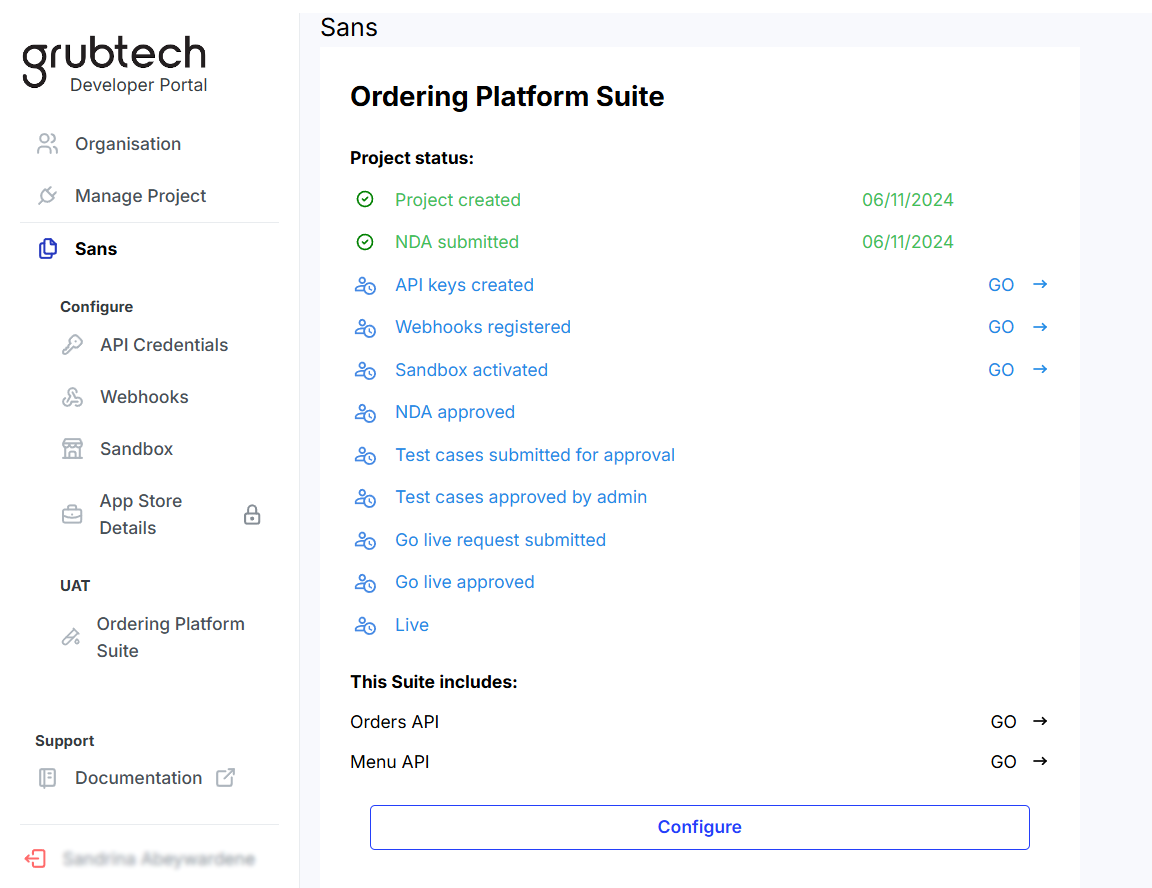
- Click Save Changes. The Ordering Platform Suite status is displayed.
Activate the POS Suite
-
Click Manage Project on the left Navigation pane. The Manage Project page is displayed.
-
Click the + Create Project button. The Create Project page is displayed.
-
In the Project Name* box, type a name for your project. The Sandbox will be created under this project name.
-
Select the POS Suite as the API you want to activate. The POS Suite API is highlighted and displayed.
- Click Next. A confirmation message is displayed.
- Click Confirm to confirm the creation of the project. The Select the functions that you support page is displayed.
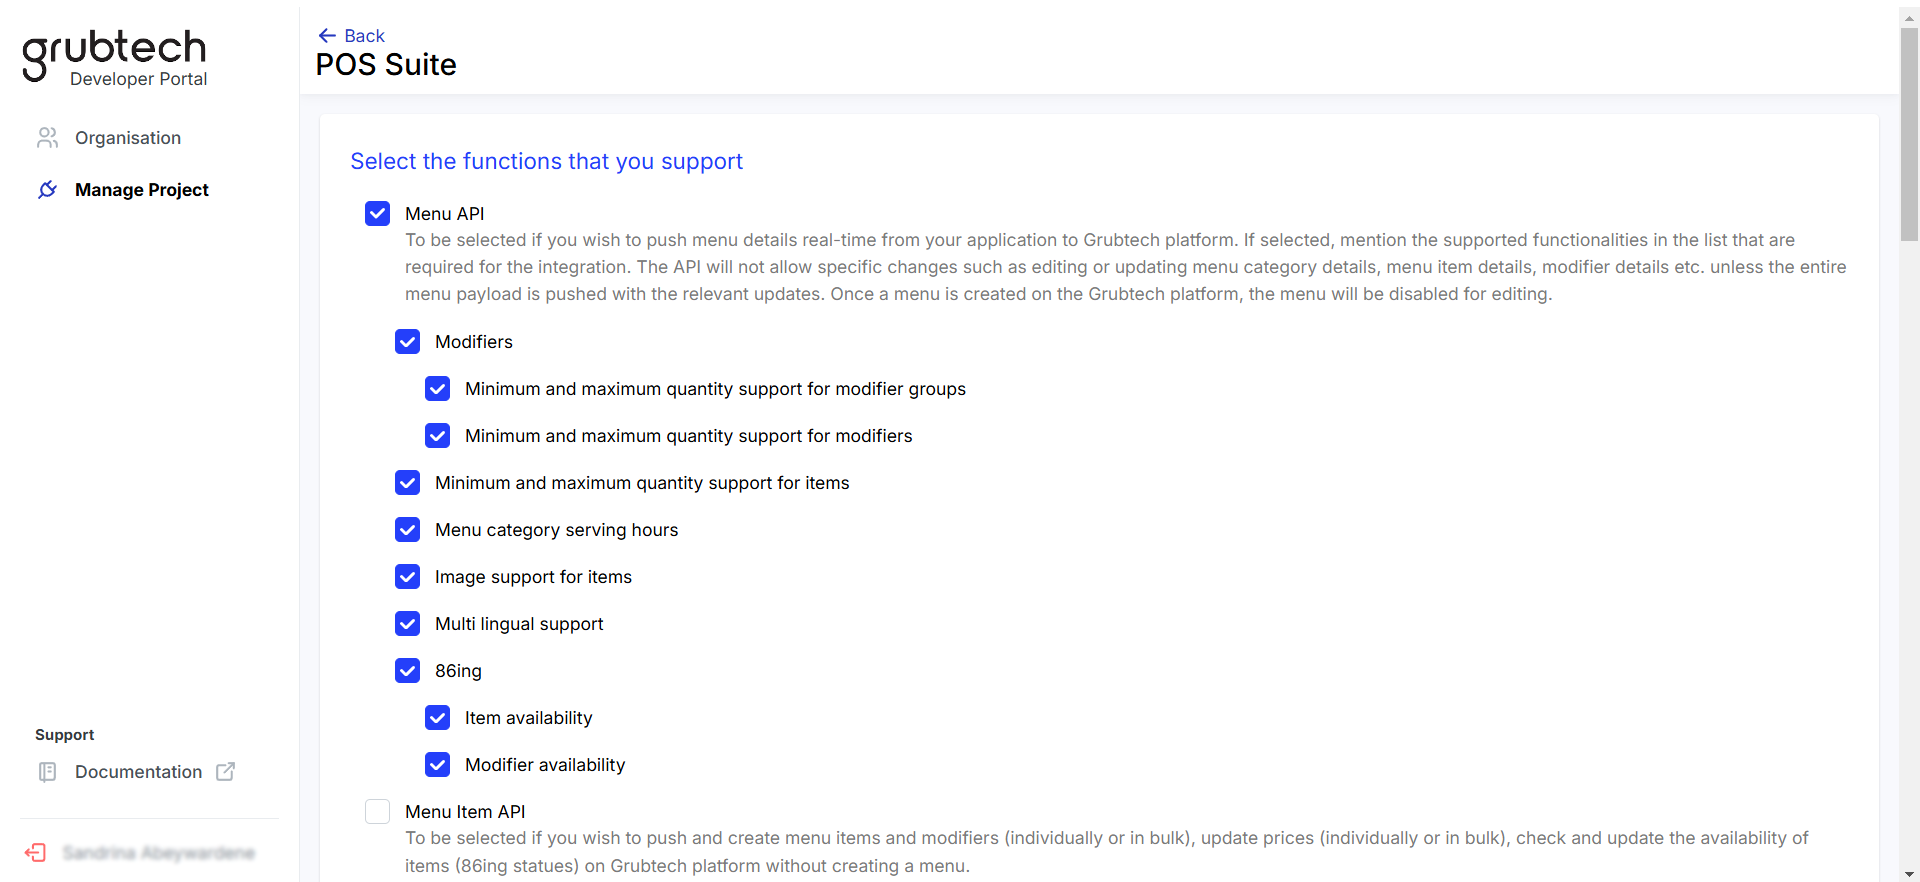
- Select the features that are supported by your system for the POS Suite.

- Click Save Changes. The POS Suite status is displayed.
Submit a NDA
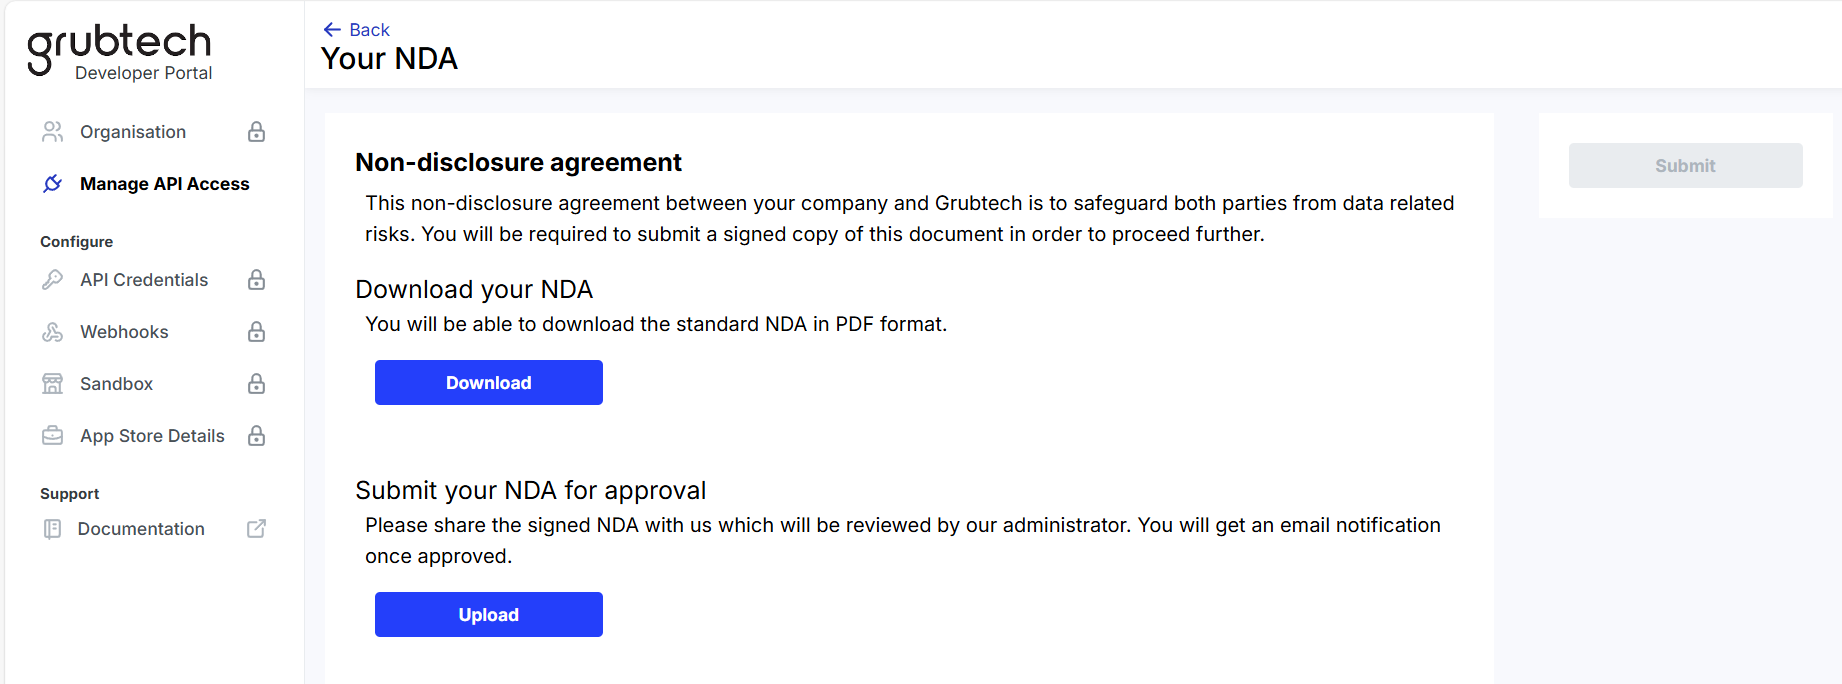
- Click Download to download the NDA in PDF format.
- Review and complete the NDA.
- Click Upload to upload your NDA.
- Click Submit to submit your NDA for approval. You will receive an email notification once your NDA is approved.
Updated over 1 year ago